.htm_cmp_aa-copy-of-topo010_bnr.gif)
Retrieving a Note from a PC is the reverse process to that of uploading covered in the previous page. We will illustrate the process using a Note called "Phys. 2/a" which we stored onto the PC in the previous page.
The short version...
 As
before, the process basically involves four steps:
- Connect the PC to the calculator using the cable.
- Start the HPGComm software on the PC.
- Use the
 button
to locate the place where your material is stored.
- Press RECV on the calculator, choose "Disk drive..." from the list of options and press ENTER. Choose the desired file from the list supplied by the PC and again press ENTER .
In more detail...
- One end of the cable should be plugged into your PC's serial port, the
other into the top of the calculator. Be very careful not to bend the
pins in the socket.
. - Start the HPGComm program. If necessary change serial ports to gain
access to a valid port. See the previous page on testing your
connection.
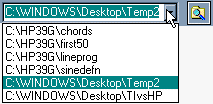
.  The
last six directories used to store or retrieve calculator objects can be
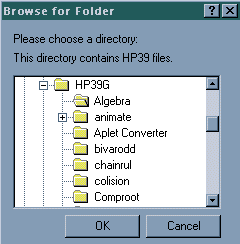
retrieved using the drop down list box. Alternatively, press the
  button
to display a directory tree for your computer. When you click on a
folder a message will appear which says either "This directory
contains HP39 files" (or 38 or 40) or "This directory
does not contain calculator files ".
. Once
the directory tree is displayed you should select the directory in which
your Note is stored. Press OK. The contents of
the directory can be viewed on the PC by pressing the
  button.
.- Ensure that you are in the Note Catalog on the
calculator. On the 39G and 40G press SHIFT 0, on the
38G press BLUE 1.
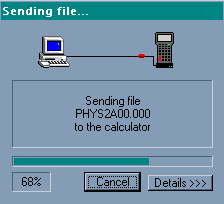
. - Press the RECV button on the calculator. From the
list of options choose Disk drive... and press ENTER
or OK. A list of objects will be presented for
downloading.
.
. - At this point you can either highlight a single item and press ENTER,
or you can use the
 button on the calculator
  to select multiple files, pressing ENTER when satisfied.
.
.
The process of downloading matrices, lists and programs is essentially the same as that outlined above. The only difference is in which view is active on the calculator. Aplets can be slightly more complex because they often have attached programs that have to be transferred as well. The main point is not to unplug the cable until the process has been completed. Aplets are covered in more detail on the next page.
|
 |
.
.
.
.
.
.
.