Sending a Note to a PC is a very common task because many students use the Notepad Catalog to store information they want to keep. A Note is also very easy to save as it has no associated attachments. In view of this I will illustrate the uploading process using a Note called "Phys. 2/a". The process is exactly the same for aplets, programs, matrices and lists.
The short version...
The process basically involves four steps:
- Connect the PC to the calculator using the cable. Make sure the calculator is switched on.
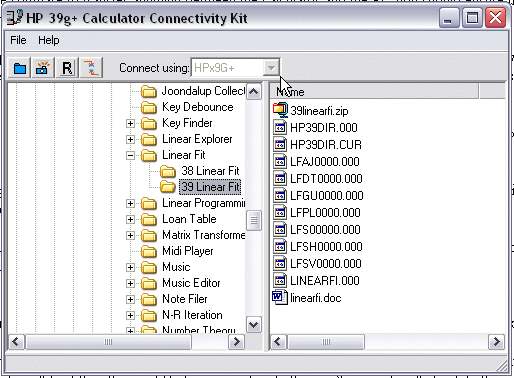
- Start the Connectivity software on the PC.
-
 Decide
where you want to store your material, if necessary creating an empty
directory to hold it. Highlight this folder using the Connectivity software.
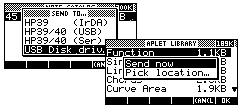
 - Press SEND on the calculator, choose "Disk drive..." from the list of options and then choose "Send Now". Just ignore the other option of "Pick location...".
In more detail...
Note: What you see when you press SEND will vary from model to model. The view above right is for a 39gs. If you have a 39g+ then the view is almost identical but the 40gs has another view (below) that doesn't mention an infra-red link. The "HP39/40 (Ser)" option is used for cable to cable communication from a 40gs to a 40gs - remember that the 40gs does not have the infra-red link of the 39gs.
I very strongly suggest that you set up a logical folder structure to contain your files. As a suggestion:
| Create a folder on your C drive called C:\HPCalc. | |||||||
In this folder, create:
|
-
One
end of the cable should be plugged into your PC's USB port, the other
into the top of the calculator.
-
 Start the Connectivity program.
. - Use the window to choose the directory into which you want to
store the files.
. -
 Ensure
that you are in the Notepad view (SHIFT 0) on the calculator. Move the highlight onto the Note that you want to transfer to
the PC.
. - Press the SEND button on the calculator (below the
screen). From the
list of options choose USB Disk drive... and press ENTER
or OK. From the next option list choose Send
Now.
. -
 If
this is the first time that you have used this particular directory on the
PC to hold calculator objects then you will now see the message shown right. You need only press ENTER
or YES to continue. No action is needed on the PC.
.
The process of downloading matrices, lists and programs is essentially the same as that outlined above. The only difference is in which view is active on the calculator. Aplets can be slightly more complex because they often have attached programs. This is not something you need to worry about - just make sure that you don't unplug until the whole process is finished.
